By Atif Balouch, director of photography, Dubai
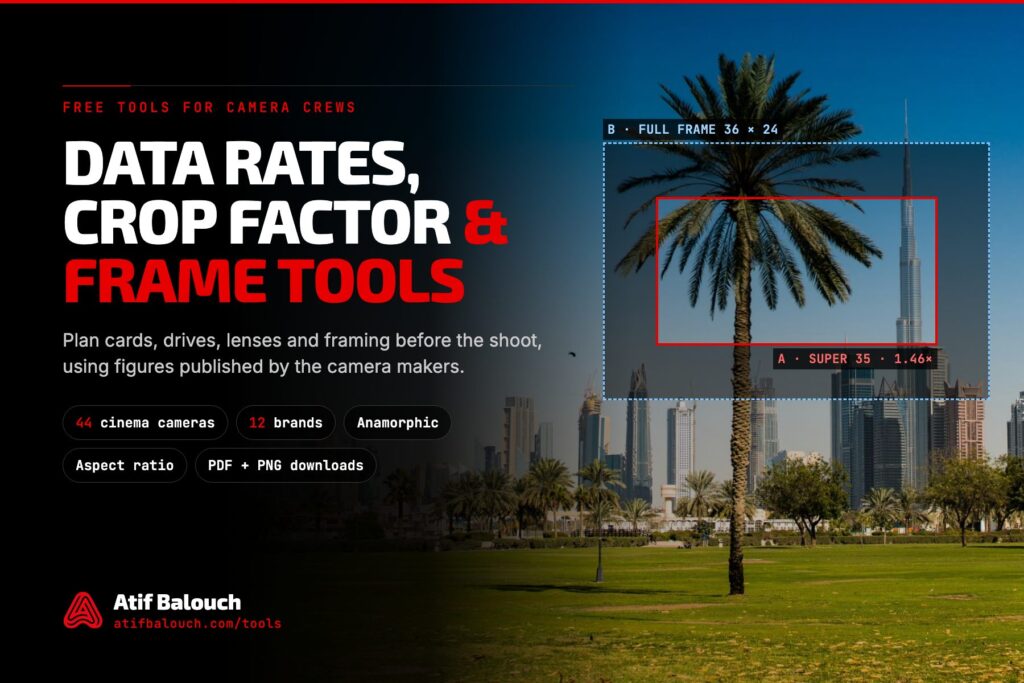
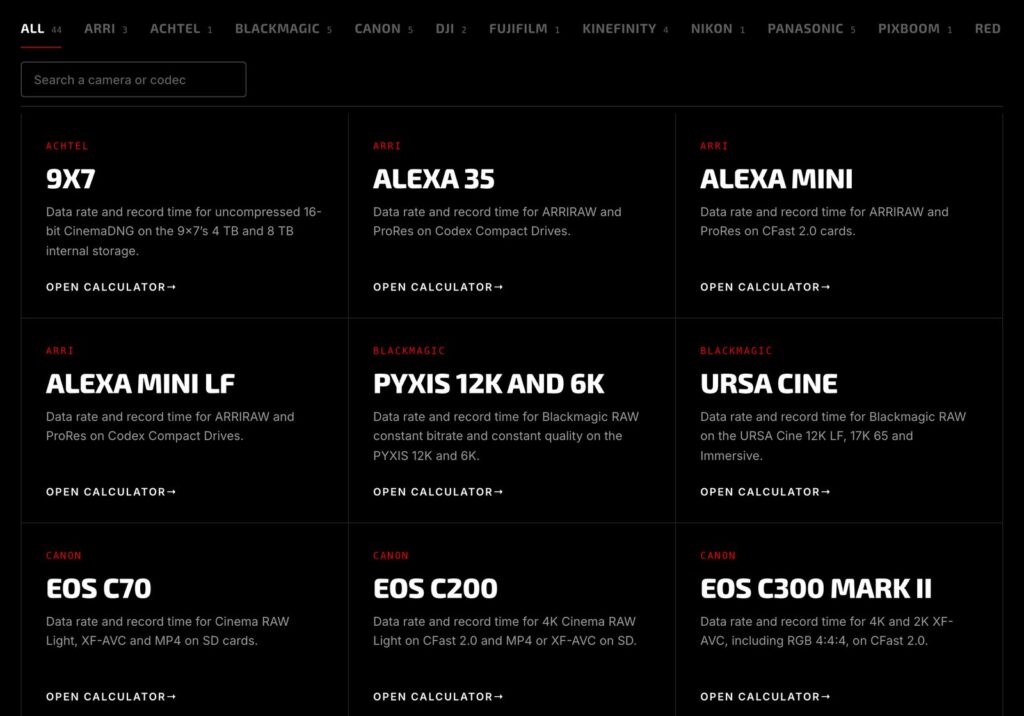
The Tools section of this website now holds a set of free calculators for camera crews. There are data rate and record time calculators for 44 cinema cameras from twelve brands, and a page that compares up to four of those cameras. A separate lens and frame page holds three more tools, each covered below. Everything is free to use, and nothing needs an account.
This post explains why I built them and what each one does. It also suggests an order for using them before a shoot.
Why I built them
I first made these calculators for my own shoots in Dubai. On most jobs the same questions arise before the camera is unpacked. How many cards does the day need? Will a 1 TB drive hold the whole shoot? Which lens on the B camera matches the A camera?
The answers are usually spread across manufacturer manuals and spec sheets, and every brand presents them differently. Collecting those figures for each job took time, so I gathered them on one site.
Once the first calculators were online, other camera operators asked for their cameras to be added. The Sony FX9, FX5, FX3 and A7S III were community requests, and more cameras followed from ARRI, RED, Canon, Blackmagic Design, Kinefinity, Panasonic LUMIX, Fujifilm, DJI, Nikon, Achtel and Pixboom. The tools are now shared with the wider camera community.
Where the numbers come from
Every figure comes from information the camera makers publish. That includes bit rates and record times from instruction manuals, ARRI’s Formats and Data Rate Calculator, RED’s own tools data, Blackmagic’s BRAW calculator method and the sensor areas in each maker’s specifications.
When a maker does not publish a value for a setting, the calculator works it out from the nearest published figure and labels the result as an estimate. Each calculator page lists its sources at the bottom, and every downloadable PDF carries a disclaimer. The figures are for planning only, so always confirm settings on the camera and with your production or post house.
The data rate calculators
Each camera has its own calculator page. You choose a recording format or codec, a resolution, a frame rate and a quality setting. The page then shows the data rate in megabytes per second and how long a chosen card or drive will last.
A few pages hold more than one camera, such as the PYXIS 12K and 6K, the URSA Cine series, the Ronin 4D-8K and 4D-6K, the Kinefinity MAVO series and the LUMIX S1II, S5IIX and S1H. On those pages a Camera row at the top switches between models.
How to use a calculator:
- Open the Tools page and pick your camera, or filter by brand.
- Choose the codec tab, then the resolution and frame rate you plan to shoot.
- Pick the quality setting and the card or drive size.
- Read the data rate and the record time. If the line under the record time says “estimate”, the value has been scaled from a nearby published figure.
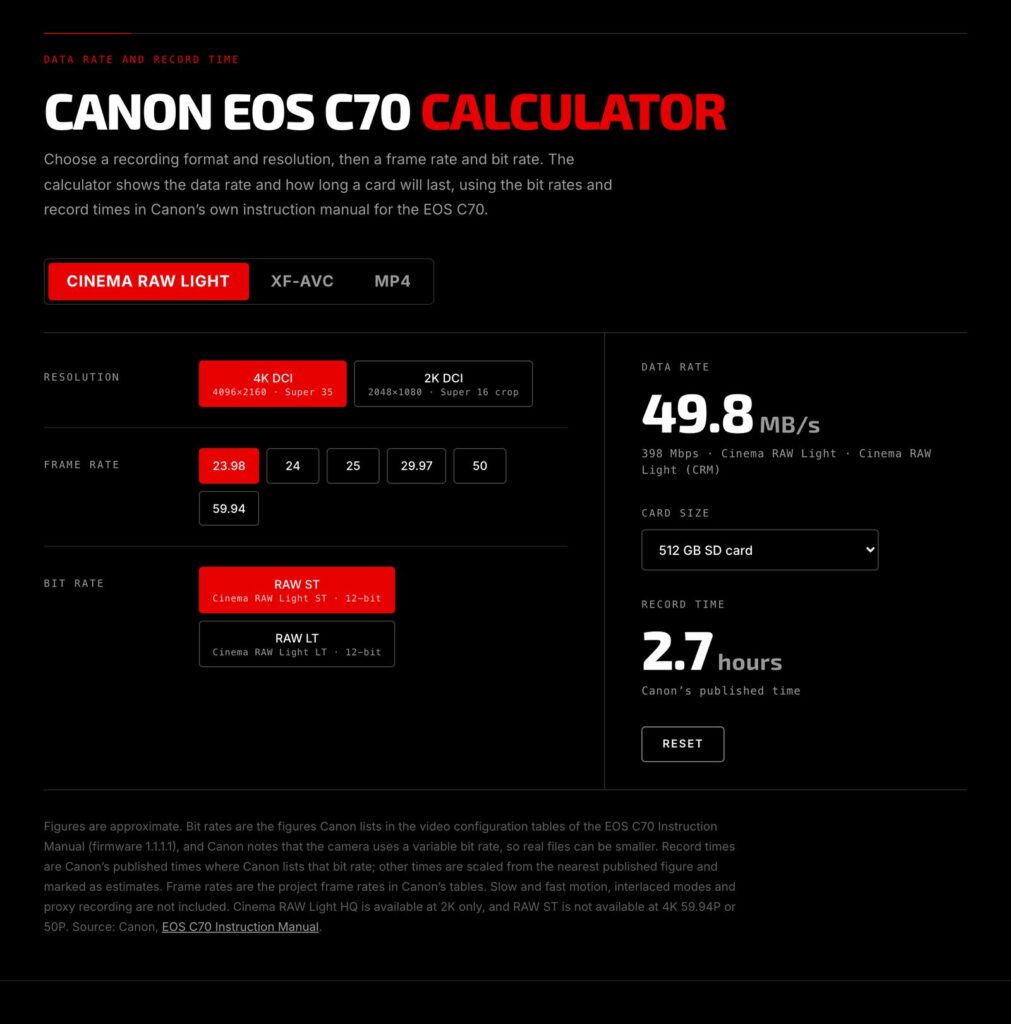
The record time tells you how many cards a shooting day needs. When the camera offers a lighter codec at the same resolution, compare the two before deciding, because the difference in storage over a long day can be large.
The comparison page
The comparison page places up to four cameras side by side. Each camera keeps its own format, resolution, frame rate and setting, so you can compare an ARRIRAW A camera with a ProRes B camera, for example.
The shoot plan asks for the footage per day, the number of shoot days, the copies you keep and the card or drive size. The page then shows the storage each camera needs per day and for the whole shoot.
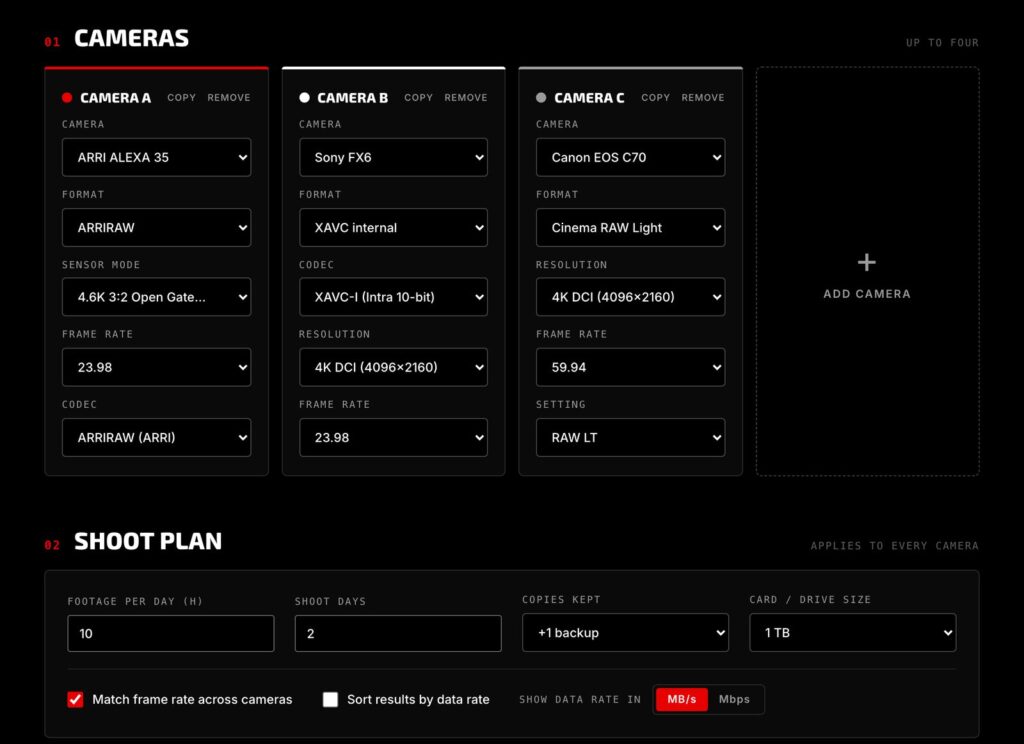
*Three cameras on the comparison page, each with its own format and frame rate, and one shoot plan for all of them.* Your choices are saved on your device, so they are still there on your next visit.
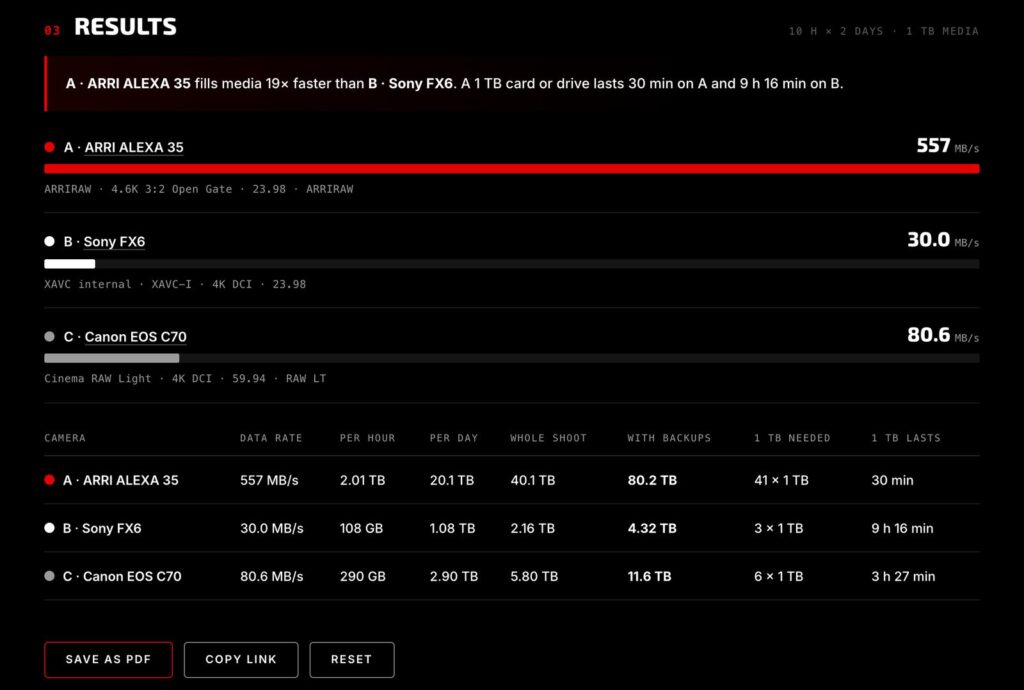
The Save as PDF button creates a one-page reference sheet with the cameras, their settings and the storage totals. It is useful to send to production or the DIT when planning media and backup.
Crop factor
The crop factor tab shows how a lens will frame on any of the 44 cameras. Pick a camera and a recording format. Then choose a focal length and compare it with a film or photo frame, such as the 35 mm stills frame, or with a second camera.
The results show the crop factor, the equivalent focal length, the horizontal and vertical angle of view and the size of the recorded area in millimetres. A drawing places both frames at true scale over a reference photo, so you can see what each format captures.
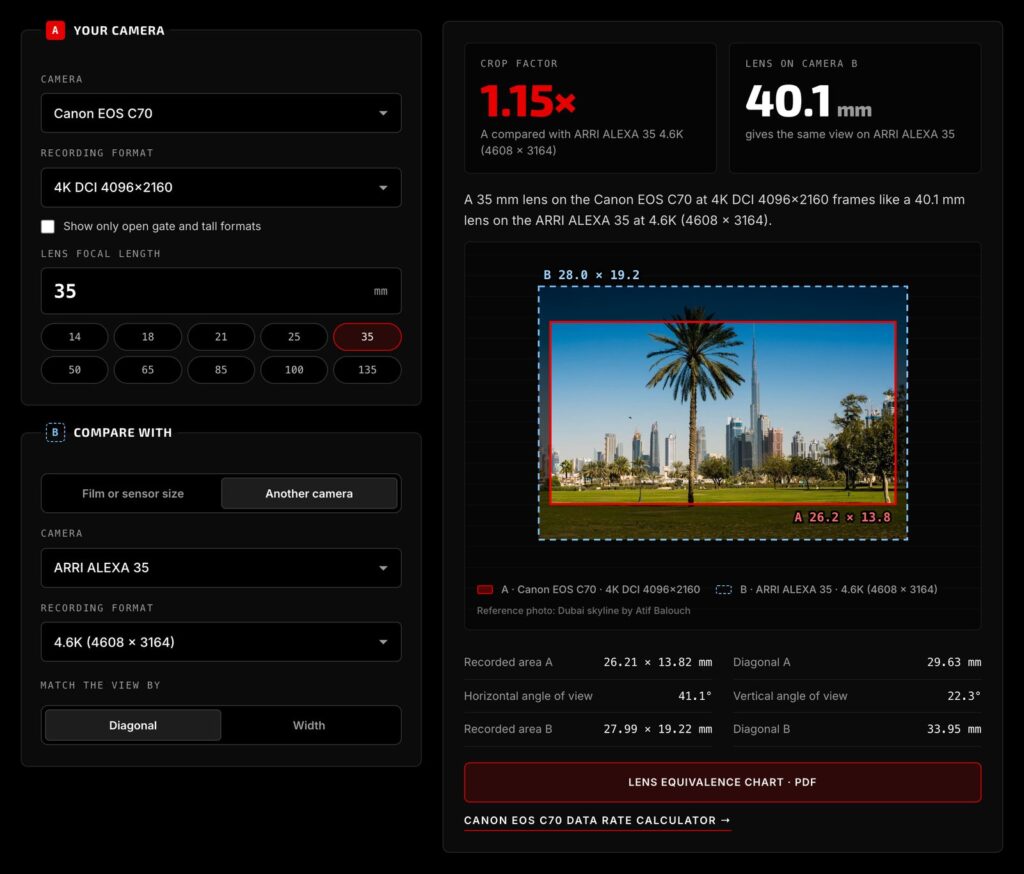
There are two ways to match lenses. Matching by diagonal is the usual crop factor. Matching by width keeps the horizontal angle of view the same, which works better when the A camera and the B camera record different aspect ratios.
To check whether a lens covers your format, look at the diagonal of the recorded area. The lens’s image circle has to be at least that size.
The Lens equivalence chart button creates a PDF for the selected camera and format, with 19 common lenses from 12 mm to 200 mm and their equivalents. Camera assistants can print it for lens prep, and it is useful in the camera report when two brands are mixed on one job.
Anamorphic
The anamorphic tab uses the same camera and format, then asks for the lens squeeze, from 1.25x to 2x or a custom value, and the frame you deliver, such as 2.39:1 or 16:9.
It shows the desqueezed aspect ratio and how much of the recorded image the delivery frame uses. The desqueezed resolution is given both ways, by stretching and by compressing. The tab also gives the angle of view and the spherical lens with the same width of view. A drawing shows the image squeezed on the sensor and restored after desqueeze.
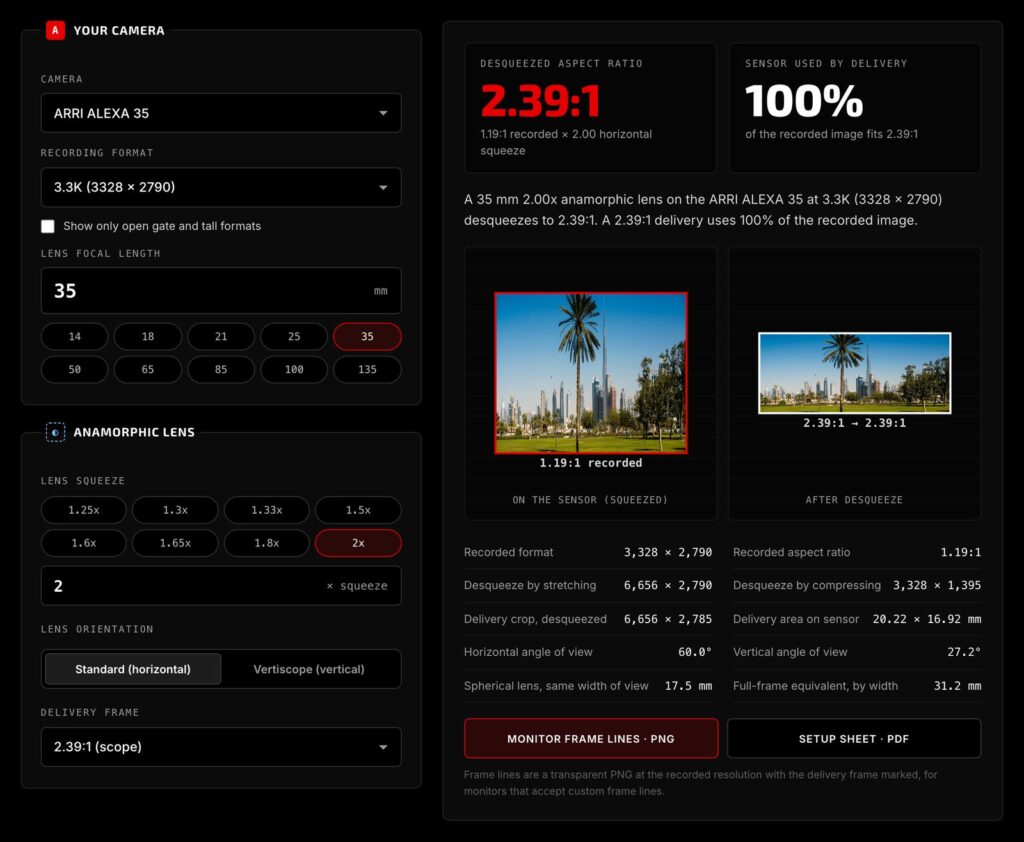
A tick box lists only open gate and tall formats, which suit 2x lenses. Wider formats such as 16:9 or 17:9 pair well with 1.3x to 1.5x lenses, so leave the box clear when you plan to use those.
For vertical delivery, the Vertiscope option applies the squeeze vertically. It then works on the height of the frame, and the delivery frames change to vertical shapes such as 9:16 and 4:5.
Two downloads sit on this tab. The Monitor frame lines PNG is a transparent image at the recorded resolution with the delivery frame marked, ready to load into a monitor that accepts custom frame lines. The Setup sheet PDF lists the camera, format, squeeze, resolutions and sensor area, with a table of common anamorphic focal lengths and their equivalents.
Aspect ratio
The aspect ratio tab sizes the active picture inside a delivery container. Pick a container, such as 4K UHD, a DCP format, 8K or a vertical 9:16 frame, then a picture aspect ratio. Custom sizes and custom ratios are both accepted.
The result shows the picture size in pixels and the size of the bars. It also names the framing type and gives the offset for placing the picture in an edit. You can fit the picture inside the container, to its width or to its height, and round the size to even pixels or to multiples of 4 or 8.
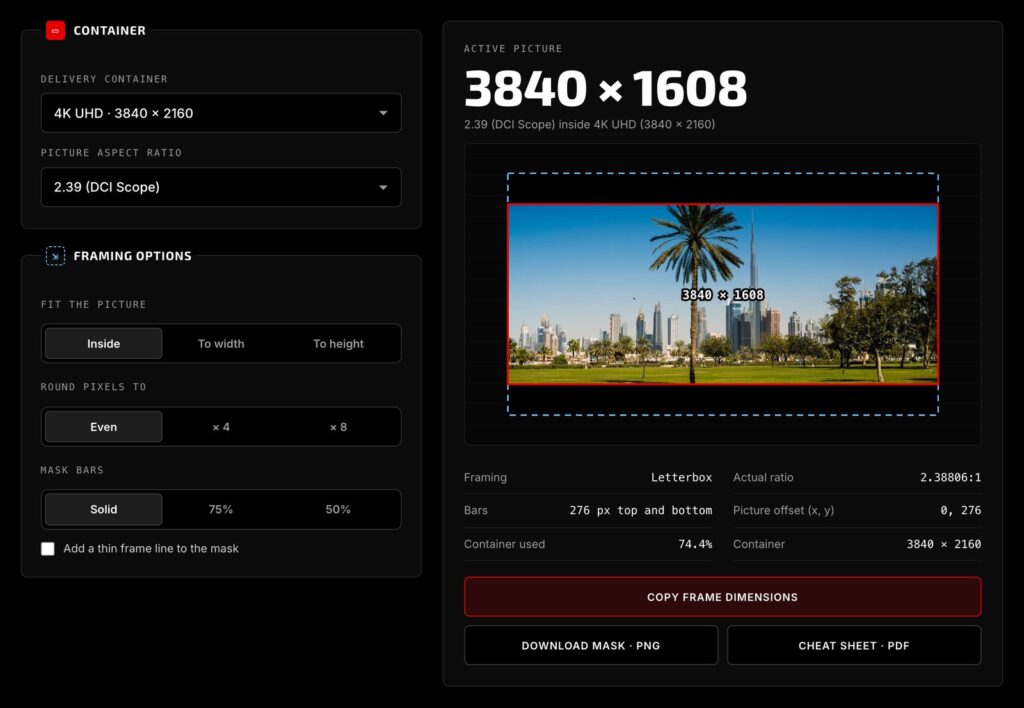
The Copy frame dimensions button copies the size for your edit or grade settings. Download mask creates a PNG at the full container size with a clear window for the picture. The Cheat sheet PDF lists every container against the common aspect ratios on one page.
Below the calculator, each container opens a full list of aspect ratios, and every size has its own copy button.
Using the tools before a shoot
A simple order works well before a shoot:
- Pick the camera and format in its data rate calculator and note the record time per card.
- Open the comparison page to total the storage for every camera on the job, then save the PDF for production.
- Use the crop factor tab to match lenses between the A camera and the B camera, and print the lens chart.
- If the job is anamorphic, download the frame lines for the monitor and the setup sheet for the camera report.
- Before the edit, use the aspect ratio tab to size the delivery frame and download the mask.
Your settings are saved in your browser on each tool, so it is worth bookmarking the pages you use most. The PDFs carry the source notes and a disclaimer, so they can be shared with the rest of the crew.
Suggest a camera
The camera list keeps growing, and several of the cameras on it were added because someone asked. If your camera is missing, or a figure looks wrong, send me a message through the contact page and I will check it.
The tools are free and shared to help the camera community. The figures are approximate and based on published information, so please confirm settings on the camera before any shoot.
Open the tools: atifbalouch.com/tools